It seems like it’s been a crazy few weeks at the Googleplex with the amount of new features that have been added into AdWords. We’re going to take a quick look into 6 of the different features available that you might not have heard of and want to get set up in your account.
RLSA – Remarketing Lists for Search Ads
What is it?
RLSA stands for Remarketing Lists for Search Ads. It has been available in beta form for a while now and was just recently pushed live across all accounts. RLSA allows you to add your existing remarketing lists into Search-only campaign. For example John clicks on your ad then lands on your site and gets a remarketing cookie. Using an RLSA linked campaign you can choose to bid for when John and other previous site visitors are searching for any specified keywords on AdWords.
This gives you a couple of extra options for targeting:
- You can use an RLSA list to bid on very broad keywords knowing that you are only showing to those users who have already been on your site. Let’s say you own a bookshop and John visited your ‘Moby Dick’ page – you could choose to show an ad for that particular book to John when he later typed in a much broader ‘books’ search to Google and know that your ad is still probably relevant and likely to convert.
- Alternatively, you could also create an RLSA campaign with just really strong, previously converting keywords in it and bid them up to a higher position (this is my preferred strategy). This means for any of your power keywords you can try and dominate top positions in the rankings that you know will drive conversions. You can afford to do so because you know you are only bidding on heavily qualified traffic that converts really well.
How do you implement it?
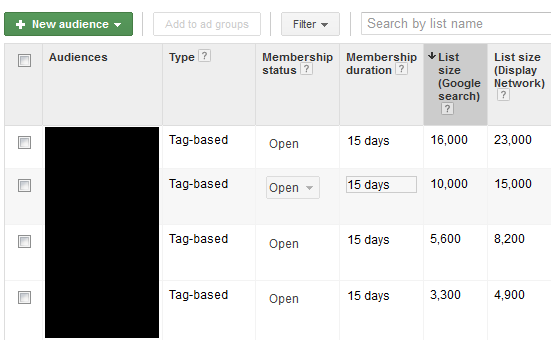
If you already have remarketing tags on your site, go into your shared library and then audiences. You should see that you now have a column labelled ‘List size (Google Search)’ – this is the amount of users you can use RLSA for.
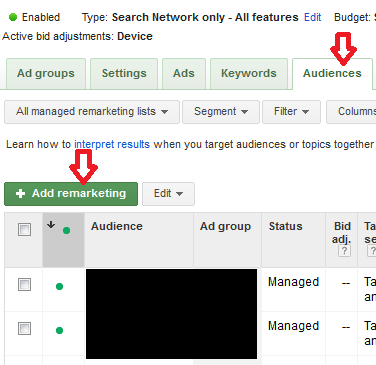
Once I know I have users in my remarketing lists, I set up a new Search Network Only campaign named ‘Campaign X – RLSA’ to which I add my desired keywords and then hit the Audiences tab. From here you can ‘Add remarketing’ to your search campaign just like you do on the display network.
What are the results like so far?
During the beta stages we saw a fairly mixed bag of results from RLSA, but had about 30% of accounts where it was a significant boost to Conversions and CPA.
Affinity Groups
What is it?
Affinity groups are new ways to bid on Interest Categories in the Display Network, which originated out of Google’s attempts to create video-friendly groups of people. Affinity groups are a little broader than ICMs, which tend to be narrowed down quite a lot. A high end hotel, for example might use the Affinity group ‘Luxury Travelers’ to target the types of people Google thinks live the Jet Set lifestyle.
How do you implement it?
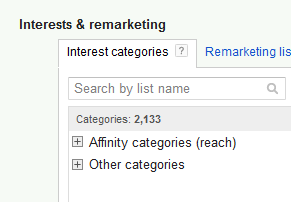
Exactly the same way as you would do with ICM. Go into your list of Interest Categories when changing Display Network settings and you should now see the following:
From here it’s as simple as opening up your category list and finding things that relate to your audience.
What are the results like so far?
So far my Affinity Group campaigns have performed slightly better than my ICM and Topic campaigns, but worse than Contextual and Managed Placements, according to Google Analytics stats.
Similar Audiences
What is it?
Similar Audiences are an attempt on Google’s part to help you reach a similar group of people to those that you have in your remarketing lists. Google looks down the information it has about those people and says ‘hey, these other people are pretty similar, you would do well to advertise to them’.
How do you implement it?
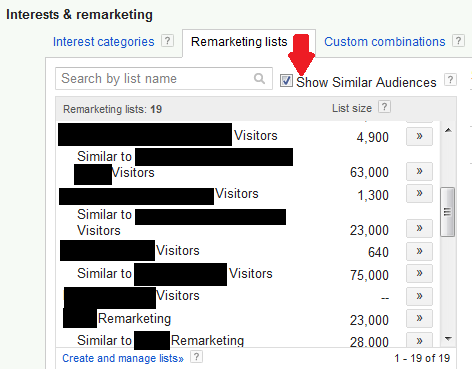
Similar Audiences can be added from your Remarketing lists section in a Display Campaign’s Display Settings. Make sure you tick the ‘Show Similar Audiences’ button to make them visible and you should see those lists appear.
What are the results like so far?
The best success has come from using ‘Similar to Visitors who Converted’ in my accounts – which makes a lot of sense given that those are probably the types people we want to bring back to our site.
Review Extensions
What is it?
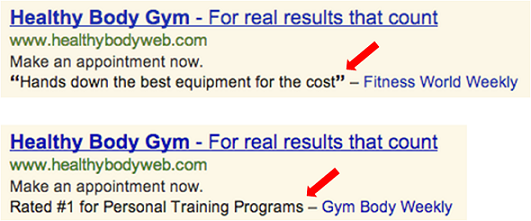
Review Extensions are a new beta that Google recently announced on the official AdWords blog. They allow you to add a snapshot summary of any good reviews you’ve had from outside sources. Take a look at the official example Google had on their blog:
How do you implement it?
Review extensions are still in beta so you’ll need to contact your Google rep to get these sorted. You need to have a review less than 67 characters, and you need to provide a link to the review on the source page. Here’s the whole shtick from Google. The most success with these is likely to come for really legitimate reviews from big publications – if no one has heard of the reviewer then you probably won’t add much value, but if I see you’ve been reviewed as excellent by the NY Times or Forbes etc. it’s much more likely to convince me to click on your ad.
Lightbox Ads For e-Commerce Catalogs
What is it?
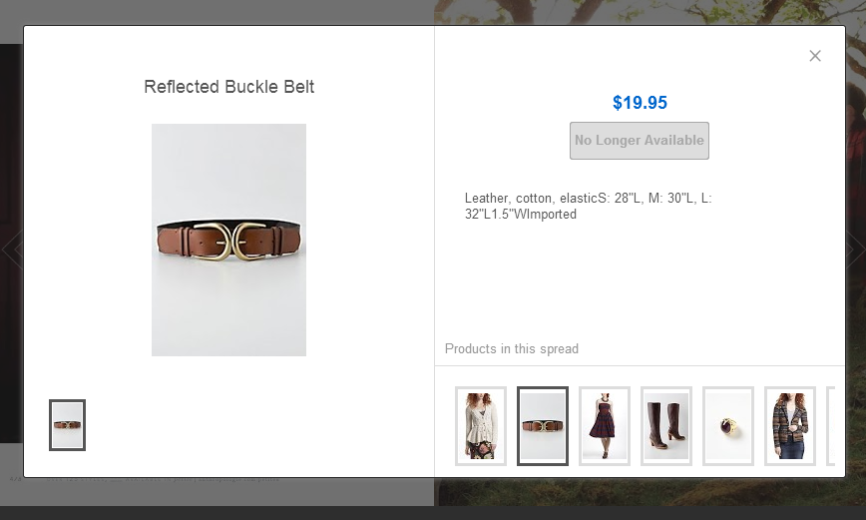
Lightbox ads have been around for a while now – they are ads you can expand out to show more text or video content by hovering over them. However, the exciting new development comes for ecommerce account managers in the shape of lightbox catalogs. If you have a .pdf version of your summer catalog available, you can get in touch with your Google rep to set these up. Just like in the example below, you can tag up the different items in your catalog to link directly with products in your Google Merchant Center feed.
How do you implement it?
As above, you need to have a pdf of your catalog, to get in touch with your Google rep, and to have a Google Merchant Center account fully set up and in working order.
Dynamic Product Ads
What is it?
You’ve almost certainly encountered these things following you about on the web – scrolling ads that show you the latest products you’ve been looking at on Amazon or any other shopping sites. Dynamic Product Ads are also recently out of beta, allowing you to go ahead and set them up yourself (once you’ve made a few tweaks to your remarketing codes).
How do you implement it?
There are a couple of precursors here again:
- Have a Google Merchant Center feed that is up to date.
- Set up dynamic remarketing tags on your site
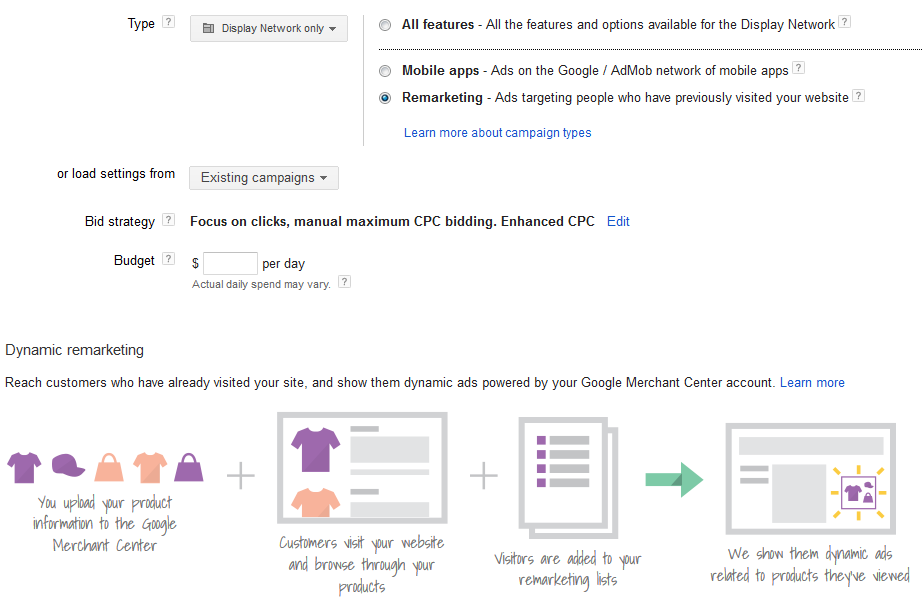
If you go to create a new campaign from which to run your dynamic remarketing, you should see the following new option show up:
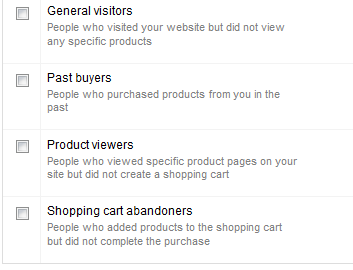
From here, Google will direct you to set up dynamic remarketing tags should you not already have them in place – essentially this means tweaking the remarketing code you have on each page to reflect the specifics of your Merchant Center Account – product id, type of page (cart, product page, shopping page etc.). You get 4 new remarketing lists created for you as part of this process:
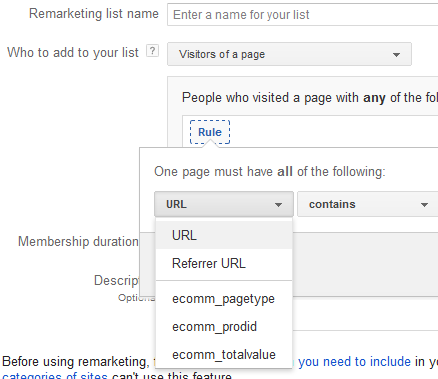
Once you have dynamic remarketing codes, you can also make some slightly more complex remarketing lists too using some new rules – such as the prodid (product id) of the item a user was looking at on your site:
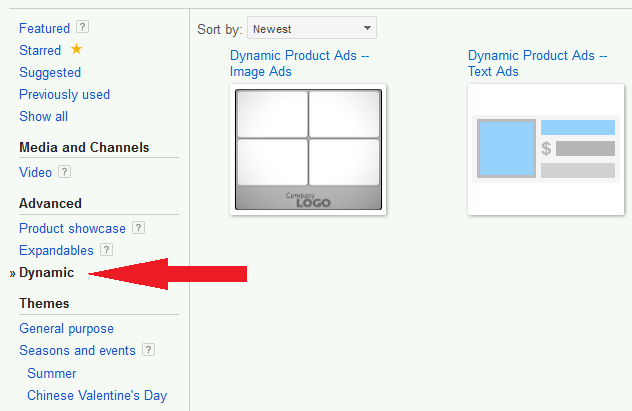
Finally, once you have your dynamic remarketing all nicely set up, you can go about creating your dynamic ads. Find these under New Ads > Display Ad Builder > Dynamic. From here you can set up ads from templates that will pull in products from your feed.
Hopefully we’ve given you some ideas to look into for expanding your accounts. If you’ve tried any of the above and have any feedback we’d love to hear from you in the comments below!


