Succeeding on Amazon isn’t just about optimizing product listings or running low ACoS PPC campaigns. You need a complete process for research, launch, optimization and expansion. These 7 steps outline the full process for getting a brand off the ground on Amazon.
- Market Research
- Product Research
- Product Optimization
- Brand Store
- Discovery
- Refinement
- Expansion
Step 1 – Market Research
First things first, you need to develop a strategy. Market research is the first phase, and will underpin your entire approach on Amazon.
Positioning
Where does the brand fit into the market? Is it an essential or non-essential product? Is it luxury or affordable? What are the key elements of the brand you need to convey to customers?
Target Market
Who should this brand appeal to? What are the wider trends in this segment’s shopping behavior?
Competitors
How many are there? How established are they? What is the benchmark pricing? Are they mostly vendors or sellers? Which ones are using paid ads?
Prime Eligibility
Is Prime the standard for your category or are most merchant fulfilled? Could you gain an edge by making products Prime eligible?
The answers to these questions will inform the next steps below, in particular your product optimization, A+ Content and brand store. From this research you may find categories with lower barriers to entry, or customer behavior trends that lead to the repositioning of a product.
Step 2 – Product Research
This step focuses on keywords, benefits, features and friction points. It informs the more specific product optimization.
For features, benefits and friction points one of the best ways to identify and prioritise them is to do some review mining. Review mining is looking over reviews and Q&A’s from your own, and competitor products. What do customers love, what do they hate and what are they unsure of?
Keywords
Some will be obvious, and naturally appear in your content. To find other terms I often use tools such as Sonar and Amazon’s Brand Analytics. Both are free, although Brand Analytics requires access to vendor or seller central. You want to identify your core keywords, synonyms and related terms.
Features
The specifications and functions. For technical products the cold, hard facts are more important. The research element is determining which features should be displayed more prominently. You can find this in Q&A’s. What are questions most often asked about?
Benefits
What the features deliver for the customer. If the high thread count of a sheet is the feature, comfort is the benefit. Here you want to look through positive reviews to identify what the customer really wants from your product.
Friction Points
Identifying what gets in the way of a purchase can be a little trickier. Those who don’t buy won’t be leaving a review. Q&A’s are a valuable resource, as are negative reviews. These can show what needs to be addressed pre-purchase in your content to ensure a smooth customer journey.
Once this research is done, you blend it all together with your positioning and messaging for the target audience to create your product content and brand store in steps 3 & 4.
Step 3 – Product Optimization
The initial stage of product optimization is getting ‘Retail Ready’.
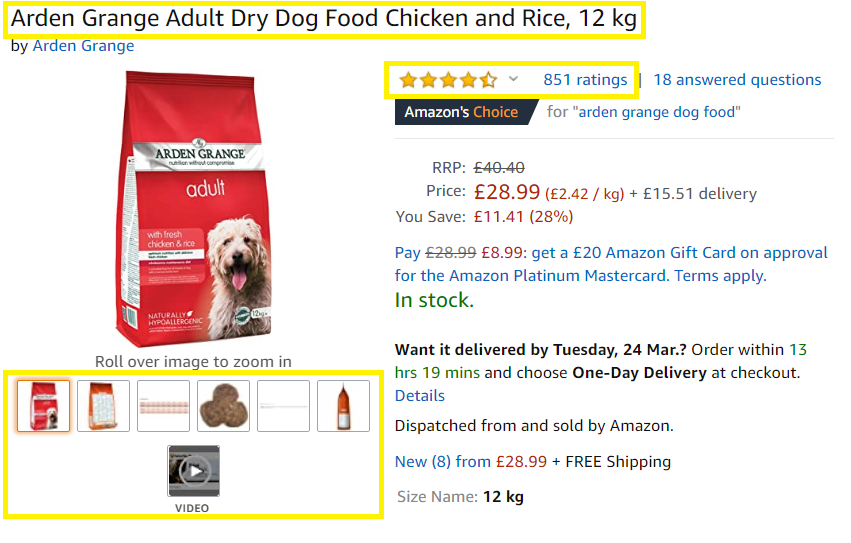
- Title provides clarity, includes the most relevant keywords & features
- Bullet Points include the most relevant features and benefits
- Descriptions provide a complete overview of the product
- Backend Keywords include all other keywords (without duplication)
- Product data as complete as possible
- Main image is policy compliant & high quality
- 5+ additional high quality images
- A+ Content
- 15+ Reviews
- Average rating of 3.5 stars or better

Creating your titles, bullet points and descriptions is straight-forward if you’ve done steps 1 & 2. Ensure the most important keywords, features, benefits and friction points are covered in the title and bullet points, the rest in the description and A+ Content. The A9 algorithm does not weight keywords based on where in your content they appear. Point to note though, A+ Content is not indexed.
The policy for the main image is strict, so focus on providing clarity. You want to clearly show the product sold, and that product alone. Additional images can showcase functionality and include lifestyle imagery to help give the product context. Providing an image with a size scale is often helpful to customers.
The reviews and ratings are a little trickier. In order to gain reviews quickly you can enrol products in the Vine program or the Early Reviewer program.
Step 4 – Brand Store
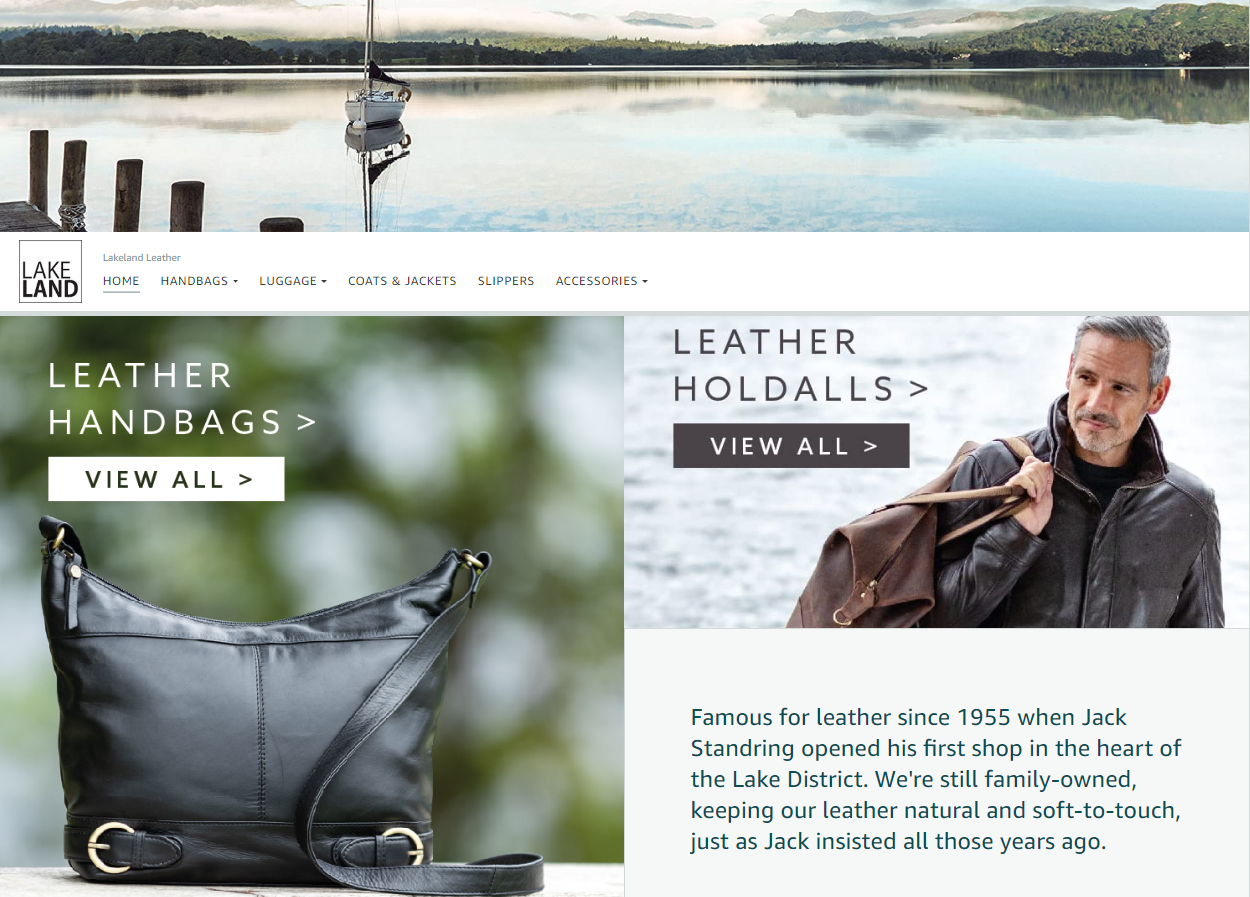
The brand store functions much like your own site within Amazon, and offers the opportunity to showcase your brand and full range of products. It’s also used as landing pages for your Sponsored Brand Ads. What key brand elements need to be included? What messaging will best appeal to your target audience?
The structure of your brand store can follow product categories, or could be structured by purpose. Different products lend themselves to different structures, one way to be more data-driven in this is to look at user search behavior.
If you sold laptops for example, you might find that rather than searches for models, you see searches for ‘laptops for students’ and ‘laptops for gaming’. You could create pages for each of these different use cases, giving your store a more intuitive design, mimicking the way people are searching for them. This is doubly effective because when you use them as landing pages for Sponsored Brands, they already match keyword themes.
Throughout, maintain the brand image and positioning. The brand store is one of the few places on Amazon you have complete over how products are displayed, don’t waste the opportunity.

Step 5 – Discovery
Account Health Markers
Content: Retail Ready
Sales Volume: Explosive Growth
ACoS: High
Targeting: Automatic drives majority of traffic
Revenue: PPC accounts for 75%+ of total sales
Now that your products are ready, you need to create a campaign structure for Amazon Advertising.
For your initial structure there are a few considerations. If your products fall neatly into their own different categories and sub-categories, that’s a good structure to start with. For example, jackets, jeans and shirts.
But if all your products are very similar, say a range of boutique gins in different flavours, should you just create an ‘all products’ campaign?
If you expect all products to show for very similar search queries, it’s reasonable to advertise them all together initially. Data will accrue faster at the search term level, and identifying productive search terms for manual targeting is the focus of this phase. You can always segment them in the refinement stage.
If however, each product will show for distinctly different queries, you may need to go as far as single product campaigns. If you sell greeting cards for example, a birthday card, get well soon card and anniversary card will show for very different searches.
In any case, consider the likely search volume. If your structure is too granular, data at the search term level will be scattered, and it will be difficult to find manual targets. This will lead to longer term reliance on automatic campaigns, slowing down the whole process.
Once you’ve decided your structure, create a Sponsored Products campaign using automatic targeting per segment. This is your keyword farm, from which you will harvest manual targets.
As the campaigns start converting, you start adding the converting search terms (both keywords and ASINs) to the relevant manual campaign. This is called ‘The Grind’. For me, any search term/ASIN that converts twice is worth isolating and testing as a manual ad target. Statistical significance evangelists may disagree, but in the early stages you want to develop your structure quickly. Keywords that turn out to be one-hit-wonders can easily be paused later down the line.
The focus for this phase is certainly on Sponsored Product Ads, but don’t disregard Sponsored Brands. What we are really after in the early stages though is rapid growth in traffic and sales, for which SPA’s are generally more effective.
Step 6 – Refinement
Account Health Markers
Content: Adding keywords
Sales Volume: Quickly growing
ACoS: Decreasing, still a little over ideal ACoS
Targeting: Automatic drives most traffic, with a growing number of manual campaigns
Revenue: PPC accounts for <75% of total sales
Through the first month or so of running your keyword farm, you will have been able to start identifying the best keywords/ASINs. Your budget should be progressively shifting more toward the manual campaigns.
By the second month your campaigns will have accrued enough data to start refining your structure. You now start to consider the ACoS more, rather than volume alone.
Refinement can include:
- Bid changes
- Adding negative keywords
- Adjusting placement modifiers
- Switching Dynamic Bidding settings
- Pausing keywords/categories/ASINs that are proving ineffectual
- Pausing match types within automatic campaigns
- Removing underperforming products from campaigns
- Further segmenting your campaign structure
You also want to ensure that the keywords proving the most effective are prominently featured in your content. It requires a little more finesse to find an appropriate place for them, at a minimum you want the terms in your backend keywords.
Step 7 – Expansion
Account Health Markers
Content: Only occasional adjustment
Sales Volume: Steadily growing
ACoS: Stable, on target
Targeting: Refined mix of manual targets, automatic for keyword discovery
Revenue: PPC accounts for <50% of total sales, decreasing to 20-30% over time
After the first few months of running campaigns, you should have a clear structure of automatic and manual targeting developed, your ACoS should be on target and the proportion of sales from paid traffic should be decreasing.
While new keyword discovery and refinement is an ever-continuing process, you’ll find you discover new keywords at a slower rate after the first couple of months. It’s at this stage that expansion becomes a more deliberate focus.
This can take a few different forms.
Target broader keywords – SPA & SBA
Automatic targeting does this… automatically, but you may have drawn down on the loose match by this stage to improve ACoS, and there is no automatic targeting for SBA’s. You can broaden by adding more flexible match types, new keywords related to your own category or complementary categories. If you’re adding keywords for complementary categories, ensure the relevant keywords can be found in your content, at least in the backend keywords.
Target related categories – SPA & SBA
Similar to the above, but in this case you reach across into related categories using product targeting. For example, if you sell specially made socks for marathon runners, you might target running shorts, running shoes and energy gels. In my experience, refining category targets by price brackets helps to narrow it down from the beginning.
The Domination Combination – SPA & SBA
Rather than broadening targeting, you can look to expand by increasing your presence where you already have a foothold. For your top keywords, double-up your targeting with both SPA & SBA to maximize your presence on search result pages. You can also consider relaxing the ACoS target on low ACoS campaigns, and allow them to naturally extend their reach with the increased traffic volume.
Well, there you go, the full process for growing a brand on Amazon. The 7 steps apply just as well to neglected accounts as they do to brand new ones, you could even jump in halfway. Keep your strategy in focus and adapt over time, Amazon doesn’t stay still for long.


