PPC dashboards are great for account managers, but they’re even better if they’re dynamic! What do I mean by dynamic, though?
A dashboard is dynamic when you can easily change inputs and review the corresponding output.
For example, in the dashboard below, I can select any of my campaign labels and the data in the dashboard will adjust according to which label I’ve chosen.
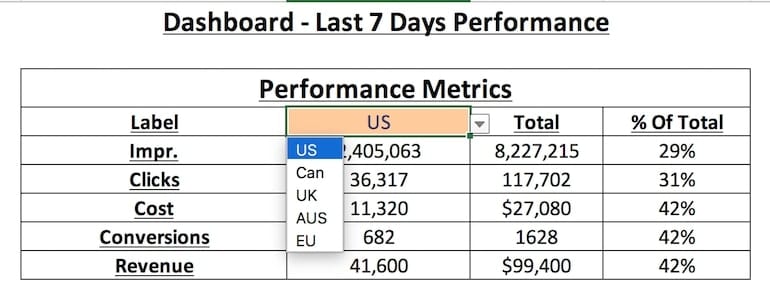
In this post, I’ll walk you through the necessary steps to create this kind of dynamic dashboard!
What is Data Validation?
First, we need to review data validation in Excel. Data validation only allows data inputs within a specified range in the chosen cells. In the example below, I’ve used data validation to limit this cell to only the list of months in the dropdown menu.
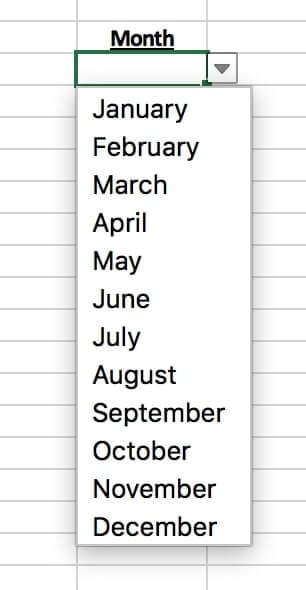
Data validation doesn’t have to be a list. It can be a number of different data types, including:
- Whole Number
- Decimal
- List
- Date
- Time
- Text Length
- Custom
The benefits of limiting a cell to a specific set of values include:
- It prevents data entry errors
- It’s less manual and thus more efficient
In this PPC use case, we’re making our dashboard more efficient by enabling the dashboard to change with the campaign label inputs, versus creating one separate dashboard for every campaign label in your paid search account. We’ll use data validation to create a dropdown list of all labels in our PPC account. Finally, we’ll set up the dashboard data so that it’s dynamically pulled from the raw data sheet based on which label you’ve chosen from the data validation dropdown list.
How To Set Up Data Validation
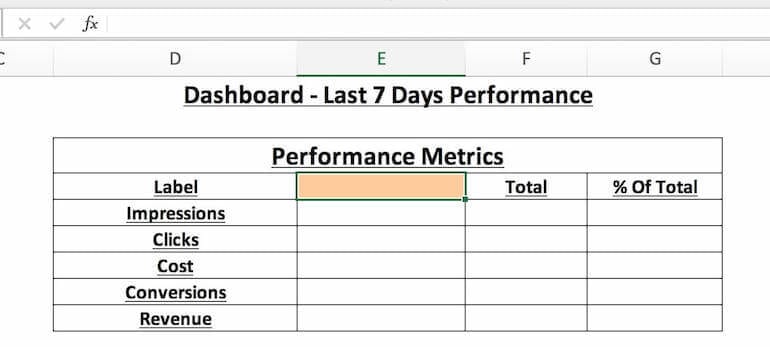
For this example, we want to set up data validation in the Label cell.
First, go to your raw data sheet, which contains the data you exported from your PPC campaigns. Determine which data field you want your dashboard to be based on. In this example, we want the dashboard data to dynamically change based on the Label of the campaign. We highlight that column in our raw data and copy it.
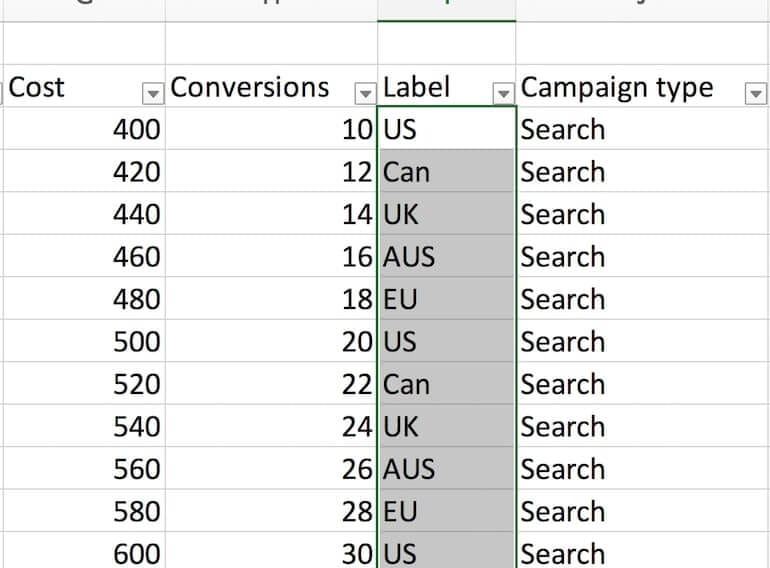
On another worksheet, paste that column and title it “LabelList”. Then, with the labels still highlighted, remove the duplicates with the Remove Duplicates button on the Data tab.
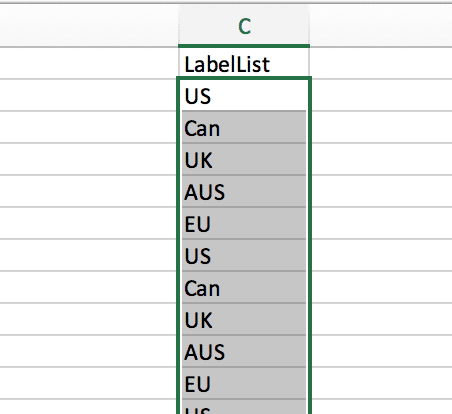
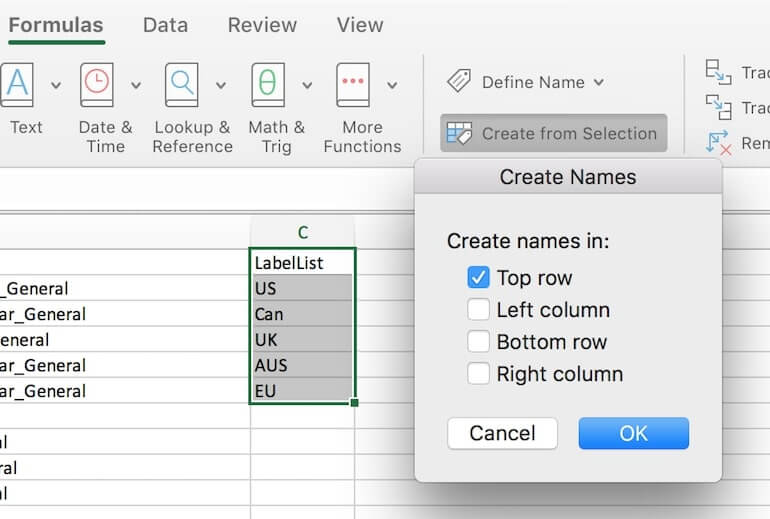
Once you’ve removed the duplicates and have a concise list of labels, you should name the list. This isn’t required, but it helps eliminate potential mistakes later on. Highlight your list, including the header, and then use the Create From Selection button in the Formulas tab. Create the list name based on the top row, where the header is located.
Once you have a list, you’re ready to add data validation to your dashboard. Click the cell where you want to place your dropdown list.

Then, go to the Data tab and select “Data Validation”. The pop-up below should appear.
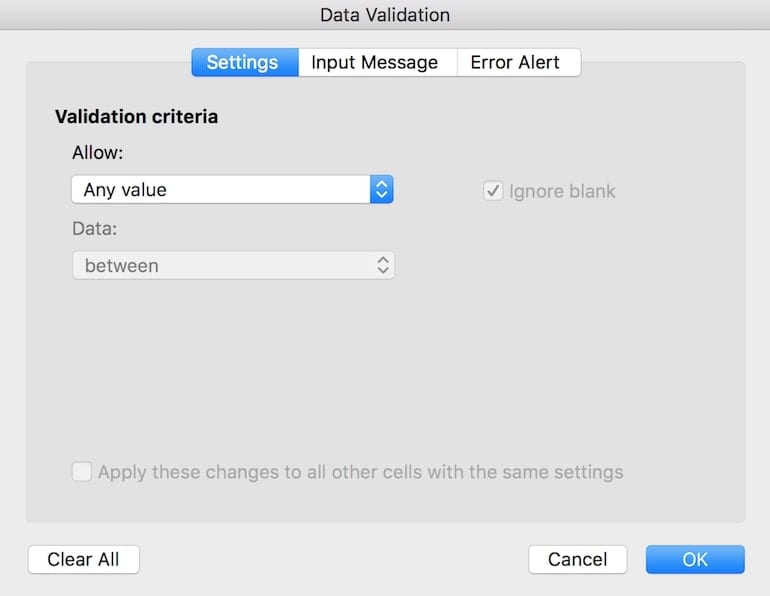
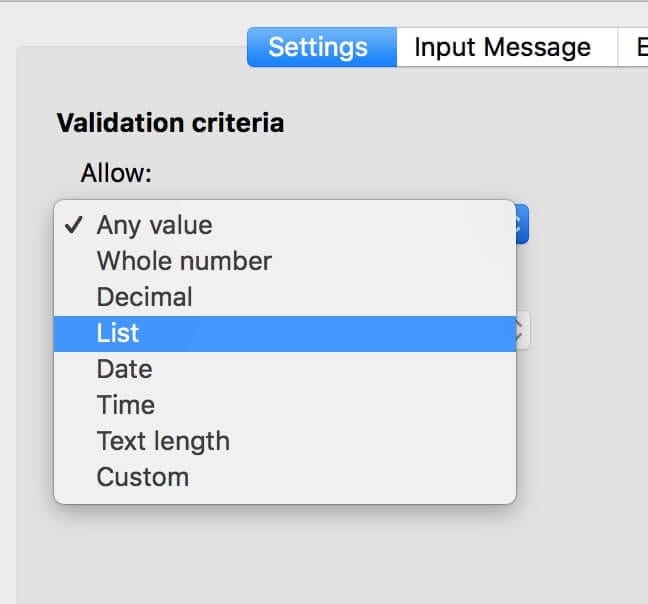
For Validation criteria, choose List.
For Source, use “=LabelList”.
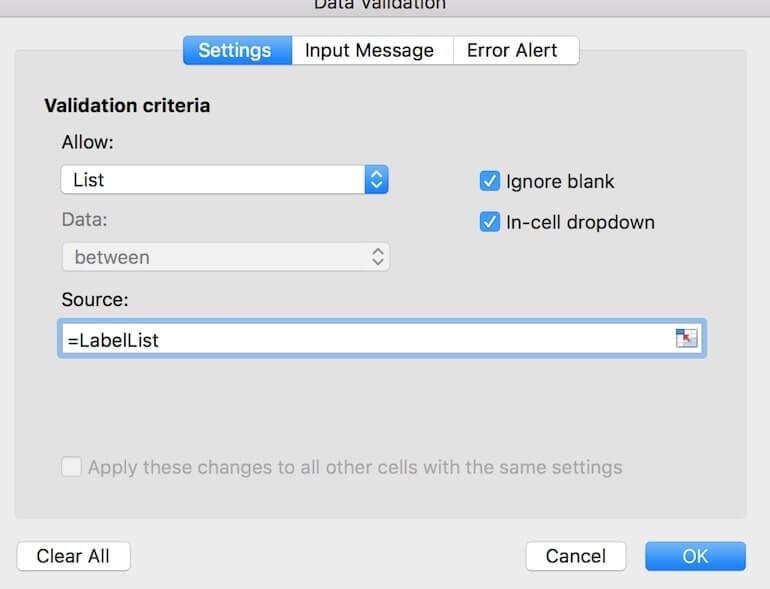
And that’s it! You should now have a dropdown that’s based on your LabelList.
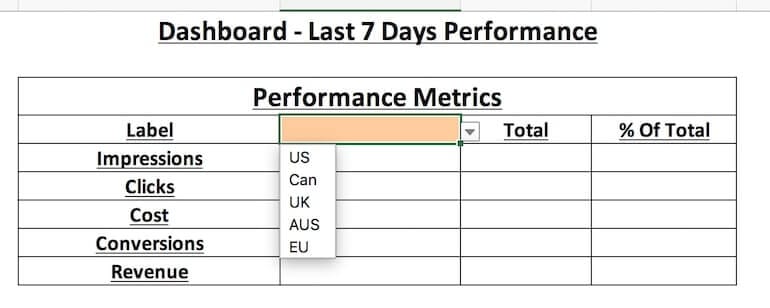
From there, you need to connect the PPC metric cells to the raw data and the new data validation cell. In my raw data, I’ve used Excel’s Create From Selection feature to name every field that I exported from my PPC account. That’s why in the formula below, you’ll see “Label” and “Impr.”. Those are the named ranges I created for my labels and impressions column in my raw data. With those, you can easily write the formula below to tell Excel to sum the respective metric from the raw data IF the label column contains whatever label you’ve selected in E4.
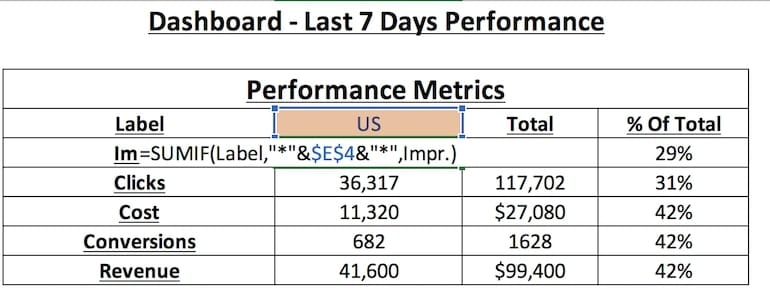
And voila! You now have a dynamic PPC dashboard.
If you want to take your dashboards one step further, you can link either your Excel workbook or maybe your Google sheet to the actual data source, like Google Ads. You can create triggers that pull Google data into your workbook on a regular basis so that your dashboard is always using the most updated data.
I hope this post helps you get one step closer to automating your dashboards and PPC reporting! Data validation has been a huge time-saver for me and my team, so I believe you can benefit too.
If you want more hands-on Excel tips, I’ll be running an Excel workshop at Hero Conf Austin this year. You can get more information on that workshop here.


