Looking for a way to drive customers through the front door? Welcome to the world of Google Local campaigns.
Designed to promote your businesses’ stores across Search, Maps, YouTube, and the Display Network, you simply add a few lines of text and let Google do the rest. This overview will include what requirements are needed before being able to run these campaigns and how to set up a campaign.
Basic Requirements:
It almost goes without saying but you’re going to need a storefront that accepts foot traffic. From there you’ll need to be able to track store visit conversions which does include some minimum requirements. According to Google:
- Have multiple physical store locations in eligible countries. Ask your account representative if store visit conversions are available in your location.
- Receive thousands of ad clicks and viewable impressions.
- Have a Google My Business account linked to your Google Ads account.
- Create each of your store locations in your Google My Business account.
- Have at least 90% of your linked locations verified in Google My Business.
- Ensure location extensions are active in your account.
- Have sufficient store visits data on the backend to attribute to ad click or viewable impressions traffic and pass our user privacy thresholds.
Google tracks store visits by utilizing a phone’s GPS history to match if someone visited your store after seeing an ad.
The next major step is ensuring you have your Google my Business locations or affiliate locations linked with Google Ads and accurate.
Once you’ve completed all the necessary steps, you should see the objective to drive Local traffic populate when you’re looking at creating a new campaign.
How to Build a Campaign:
This is a smart campaign so building a campaign is pretty easy. Our main levers are campaign budget and ad assets.
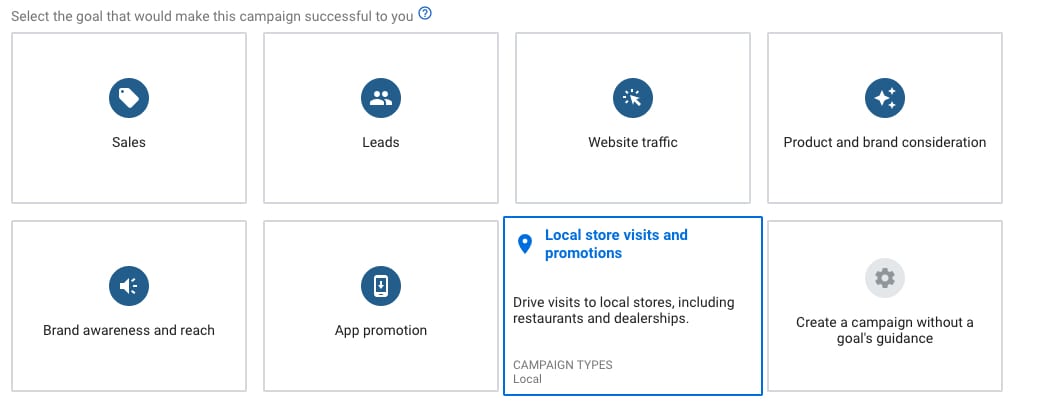
When you go to create your campaign, you’ll be greeted by the familiar goal screen. You’ll click on the local store visits and promotions option to start building.

You don’t have many levers to pull but you can opt into creating location groups. This is helpful if you have regional budgets or know that performance differs between areas. Think of this in a similar to product feed segmentation. Cluster like locations together but it’s not necessary or something you’d want to do for every single business.
In the next step, you set campaign budget, language targeting, and you do have the ability to show a product feed if you want to display physical inventory.
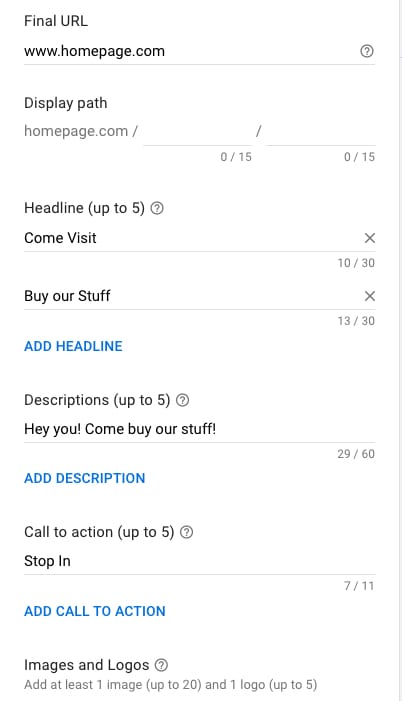
Finally, we are brought to the ad creation section. These are basic ads that Google manages and manipulates out to various networks. I recommend testing a wide variety of ideas beyond what you would in traditional search. You want to grab people’s attention and drive them to visit your store. That’s a much larger ask than clicking on your website!

These are simple ads as you can see. Images and videos are important so be sure to use imagery that is eye-catching. If someone is searching for pizza places by them, it never hurts to show a pizza ready to satiate their hunger!
From there, I encourage constant testing to ensure you’re continually driving more people to your stores. If you want even more granular data, adjust the in-store visit conversion action to be your average order value.
Possible Tests:
While limited in campaign creation, there are a number of tests you can run to continually nudge performance in a positive direction. Audience targeting is an easy first step. Break out people who have visited your website recently or test out in-market audiences.
Another great option would be testing the landing page on your website. If you’re a retail store, land people directly on a sales page. If you’re a restaurant, try the menu.
Driving in-store traffic doesn’t work for every business but it can be a valuable tool to ensure your brick and mortar store sees steady traffic.


